
On an average year, an estimated 1.3 billion tons of food is wasted globally – one third of all food produced for human consumption. And that was before a global pandemic struck. Now, between panic buying at the grocery store, restaurants closing worldwide, and food supply chains scrambling to readjust to our new “normal”, experts say that number is bound to increase.
So, I’ve come up with a few easy food waste fixes to help you tackle waste at home, and keep your sustainability goals in mind even during a crisis.
Here’s the thing about all of these recipes: if you don’t have something, leave it out. Or substitute something comparable. The point is to repurpose rather than buy more. Get creative! The worst that can happen is something won’t turn out perfect. Remember, these items were destined for the trash anyways. We’re giving them a second life.
I am something of a master at buying too much fresh produce thinking I’ll be able to eat it all before it turns. So, additionally, I’ve been trying to rethink and reduce my purchases by meal planning ahead of time, before I actually hit the store.
NOTE: All of these DIYs have actually been done by me. True story.
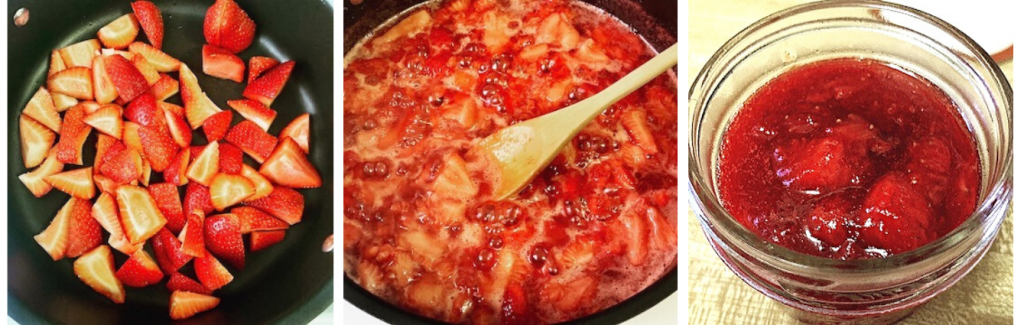
Super Simple Fruit Jam
There’s nothing better than fresh berries. But they don’t last very long and I’ve often had them become overripe before I’ve been able to eat them. While a not so pleasing texture on the palate, overripe berries are perfect for jam. I’ve tried this with both strawberries and blueberries successfully. Enjoy on toast, on yogurt, with peanut butter, or even on top of pancakes. You’ll need:
— 16oz not so fresh strawberries (or other fruit that may no longer be picture perfect)
— 1/3 cup sugar
Quarter the strawberries, add sugar, and simmer on medium-ish heat until the sugar dissolves and the berries break down. I used a potato masher to squish up the berries as they bubbled away. It will thicken up after 10-15 minutes. Let cool and refrigerate for up to 2 weeks or until it grows some funky mold, smells, or tastes bad. Be sure to compost the hulls if you’re able. With the blueberries, I also added 1/3 cup of water.
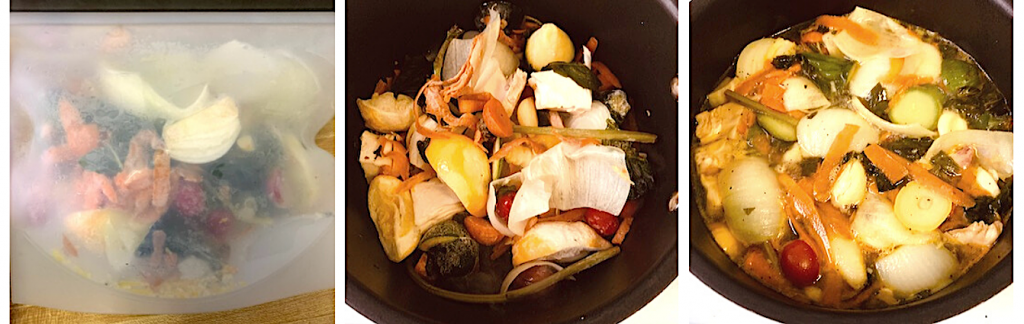
Vegetable Stock
With all the cooking at home now, I find I have a ton more organic kitchen scraps. If you’re able to compost yours, definitely do it. But another option is vegetable stock. Save your scraps in a silicone bag and stash in the freezer until it’s full. I used a quart sized bag and filled it with carrot peels, bits of garlic, the ends of some squash, a lemon rind and zest, basil scraps, cilantro stems, onion ends, shriveled grape tomatoes, mushroom stems – basically whatever wasn’t used in a recipe last week. I also added a parmesan rind that was hiding in the back of my fridge. The internet told me this was a good idea, and I can’t complain. My house smells amazing.
I’ve read that some veggies like string beans can impart a bitter flavor, starchy veggies like potatoes can make it cloudy/gummy, and beets will turn your stock pink. This is your food waste adventure, though, so you do you! You’ll need:
— 1 qt frozen veggie scraps
— 1 tbsp olive oil
— water
— ¼ tsp turmeric
— salt
— pepper
Heat oil in a pot that will be big enough for your veggies. Add frozen veggies and cook until defrosted and fragrant. This will give your stock a deeper flavor. Cover with water to about an inch over the veggies. Season with salt and pepper to taste. Add whatever herbs you like. I used turmeric because I’ve been reading about its purported anti-inflammatory properties and it makes everything a beautiful color. You can skip this step if you prefer to use the stock unseasoned and then season according to the recipe you’re planning. Bring to a boil and then reduce heat. Simmer for at least an hour, stirring occasionally. When the flavor is where you want it, remove from heat and strain out the now very dead vegetables (you can still compost these). Freeze or store in the fridge until funky.
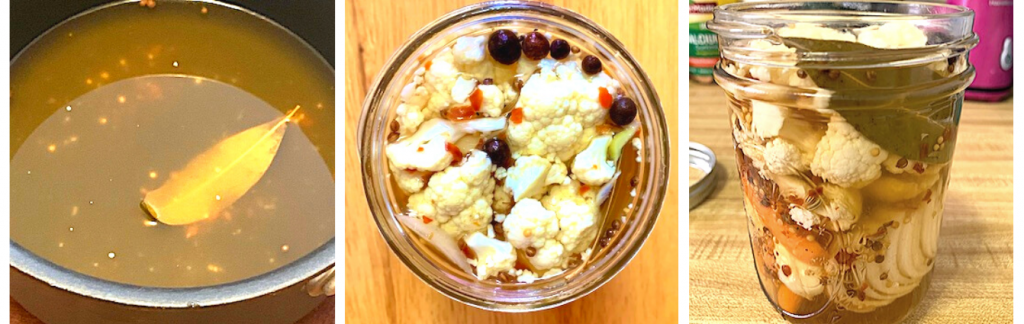
Sweet and Spicy Pickled Cauliflower
This recipe came about after I used half a head of cauliflower for one recipe, and then forgot about the other half in the vegetable drawer. Cauliflower can last for a while in the fridge and after cutting off a few brown spots, I still had quite a bit of viable cruciferous-ness left. This is a quick pickle method or refrigerator pickle. If you have a legit pickling set up and know how to do that, go for it! You’ll need:
— 1 1/4 cups white or apple cider vinegar
— 2 tbsp sugar
— 1 tsp mustard seeds
— 1 Bay leaf
— 1 tsp coriander seeds
— 1/2 tsp whole allspice
— 1 tsp red pepper flakes (this makes a pretty spicy batch, so lower or omit if you can’t take the heat)
— 1/4 tsp fennel seeds
— 1/4 tsp ground ginger or fresh grated if you happen to have it
— 2 pinches Kosher or any salt
— 2 pinches ground black pepper or use whole peppercorns
— 1 cup cauliflower florets broken into bite sized pieces
— 1/2 cup baby carrots sliced in ½ inch diagonals
— 1/2 cup onion cut into chunks
Bring vinegar and all ingredients except for the veggies to a boil over medium high heat, stirring until sugar is dissolved. While the liquid mixture is heating, pack a mason jar with the veggies. Pour vinegar mixture over veggies and let cool to room temp before covering and refrigerating. Let sit for at least two days and voilà! Pickles! You can forget about pickles for far longer than you can forget about fresh vegetables.
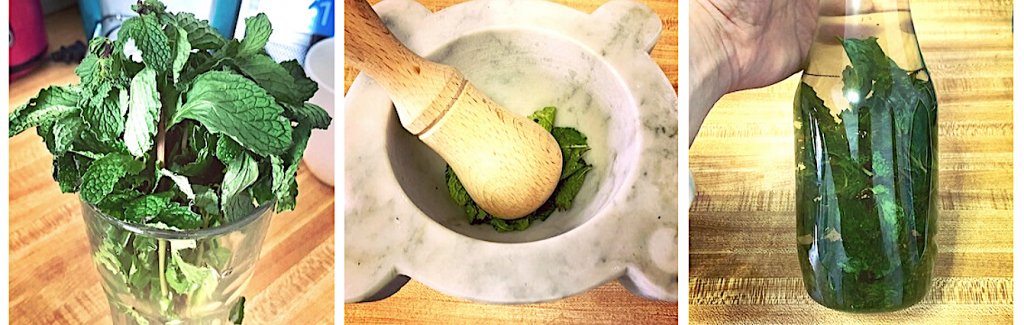
Mint Water and Tea
Buying herbs is often a big source of waste as recipes usually only call for a pinch of this or a sprig of that. The only way to buy small portions is often in little plastic boxes and no one wants that. I recently bought a bunch of mint to use literally 7 leaves in a recipe. What to do with all that leftover mint? Mint tea and refreshing mint water! Just muddle and pour hot water over through a strainer for tea. Or muddle, add to any container, and fill with water for a refreshing sipper throughout the day. Muddling releases the oils in the leaves for a mintier flavor. You can keep adding water to the container until the mintiness runs out or the leaves begin to rot. Compost the stems and used mint, if you’re able. My carafe there is from a concert where we bought a bottle of wine, but they would not let us take the bottle. It had to be poured in a “safe” plastic container. I absolutely could not bring myself to throw it out. I was pretty furious at the time, but it has come in handy!
Another option for mint and any other fresh herb is to simply dry it. Just tie together and hang upside down until it gets crumbly. Store in jars and experiment with making your own herb blends.
Leftovers
Since I’m cooking for one, I almost always have leftovers. My very favorite thing to do with them involves wraps. I am never without a stash of these in the fridge. I’ll either throw leftovers on top with a little bit of cheese and bake in the oven for a quick “pizza” or wrap ‘em up cold for a lunch sandwich. You can throw just about anything you have in the fridge in a wrap. But, ya know, not the veggie stock we just made. Cause, physics.
If you do have a ton of leftovers from a particular dish, put them in an airtight container or silicone bag and freeze them. Don’t even bother with the idea of making yourself eat the same thing for 5 nights in a row. You’re more likely to end up throwing your leftovers out if you go that route. Been there, done that.

Coffee Grounds
I drink a fair amount of coffee. And I’m not alone. In fact, the world consumes over 2.25 billion cups of coffee a day. And that makes for a lot of used coffee grounds. Eminently compostable, you can also use coffee grounds in your fridge to eliminate odors, much like an open box of baking soda. You can even use them to up your shower game with a body scrub or exfoliating soap bar. These will work whether your grounds are coming from a drip coffee maker or you’re prying them out of a Kcup so you can recycle it.
Coffee Grounds Exfoliating Soap
— 1 tbsp used coffee grounds
— 1 bar of soap
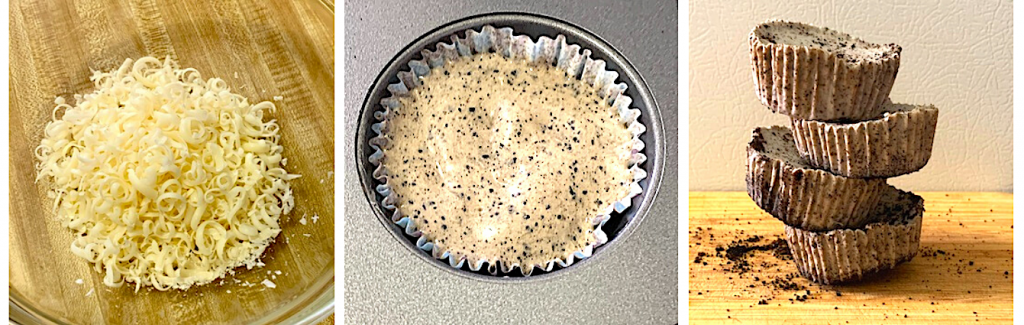
If you look up how to melt soap online, you’re gonna find two methods: microwave and double boiler. I don’t know if it’s the type of soap I used or what, but I do not recommend microwaving it. My first attempt at this netted me something that was a cross between bleached-out coral and popcorn.
So. Grate the soap bar into a bowl. Place bowl over pot with bowling water and stir until soap melts. If it doesn’t seem to be melting, add water 1 tbsp at a time while stirring gently. Once soap is melted – and it won’t be liquid, it will be more like frosting – stir in your coffee grounds. Pour into a cupcake pan lined with either silicone or paper cupcake cups. I only had paper, so I spritzed them with a little bit of olive oil with the thought that the paper might be difficult to remove. Let set. This can take anywhere from a few hours to a couple of days depending on the moisture content of the original soap and how much water you added to it. Once the soap has hardened you can store in an airtight container or wrap with beeswax.
I absolutely love these soaps for washing my hands, but make sure to use a moisturizer after. You’re exfoliating, after all.
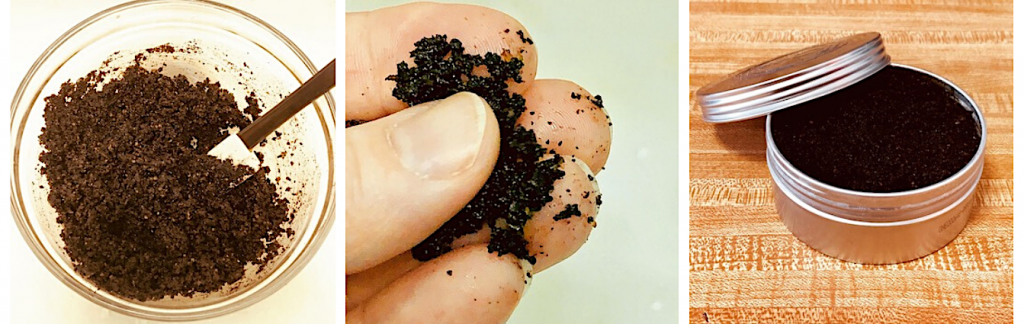
Coffee Grounds Body Scrub
— 1 cup used coffee grounds
— 3 tbsp large grain salt or sugar (i.e. Kosher salt or raw sugar)
— 1/3 cup oil
Add ingredients to a bowl and stir until blended. Then store in an airtight container. I actually had an old tin body scrub container that I’d held on to for years apparently for just this moment. In terms of the oil, use what you have. Coconut oil is ideal because of its scent, but nut oils, avocado oil, olive oil, or just plain vegetable oil work great. That’s what I had, so that’s what I used. Just avoid any oil with anything you might be allergic to or hate the smell of. Sesame oil comes to mind…
SIDE NOTE: These do take some clean up after use in the shower. You’re going to find coffee grinds everywhere. Keep that in mind. Additionally, if you’re as fair (or some have gone so far as to say “pasty”) as I am, you may inadvertently acquire a temporary subtle coffee glow. I like it and my skin feels super soft!
Best By, Use By, Sell By, Use Before, Expiration Dates
Store bought food comes with all sorts of labels and dates to let you know when it’s safe to consume. But these dates don’t always correlate to the current actual state of your food. And some of these measurements are more a measure of when a company thinks you should purchase more of their product, than of food gone bad. The very best way to know when your food is no longer edible is to use your senses:
1. Does it look funny?
2. Does it smell funny?
3. Does it feel funny?
4. Does it taste funny?
5. Does it sound funny?
If it grows fur or mold, smells rotten, develops slime, or tastes like booze when there’s no booze involved, these are all pretty good indicators that you shouldn’t be eating it. And if it’s gotten to the point where it’s making sounds, you should probably consider running away. Quickly.
You can learn more about food labeling here and here.
That’s all I’ve got for today. I feel a Part 2 in the works, though. Do you have any super simple recipes to make use of your leftovers? What are YOU doing around the kitchen to fight food waste? Share your fixes with us below and we’ll share them with the rest of the swrm!


Pingback:Is Coronavirus going to cause a viral awakening? – swrm